Tiny Desks and Chairs for Tiny Humans-Instructions

THE IDEA
In November, our Construction Manager and founding member Shawn Serdahl brought in a picture of a desk that was being made by a carpenter in Texas for low income families and their children. He made a pile of them and gave them to his neighbors…we thought now that is a good idea…we are surrounded by families barely hanging on and now their little ones are at home trying to keep up in school via zoom meeting and bedrooms and couches and dining tables converted to classrooms.
So we did what we do best…design stuff people need and build it.. Shawn and Patrick, our General manager made a few prototypes out of some scrap plywood until they arrived at 2 styles of desks…with a matching chair; one for the littluns…K-grade 3 and a slightly taller version for children Grade 3 to 6. We decided to build 60 of them with matching chairs for the first run…they would all be delivered to local Title 1 families (more on that here) free of charge.
What follows is the result of that process; instructions on how to build your own, for your neighbor or your community. These were built almost entirely with volunteer labor with folks of limited carpentry skills. Over the course of several weekends in November our team and a few friends, ganged up to build and finish 60 of these desks and chairs


Read on for a set of plans, materials and cut lists, and instructions on how to machine and assemble each part with basic woodworking tools.
THE PLANS
Click on the plans below to download a printable PDF.

THE MATERIALS
3/4’ Cabinet Grade Maple Plywood.
1-1/2” Pocket Hole Screws
1-1/4” Wood Screws
Wood Glue
Water based acrylic or your finish of choice
THE TOOLS
Table Saw
10” Miter/Chop Saw
Alternately you could use a portable circular or jig saw but results will be improved with larger stationary tools. Instructions assume you are using a chop saw and tablesaw.
Random Orbital Sander and 220 grit sandpaper
Drill
Screw Driver
Pocket hole jig w/drill bit and pocket hole screw driver
Kreg Face Clamp (Bar clamp would work too)
CUTTING OUT THE PART BLANKS
Start with laying out the parts on the plywood. Refer to parts list on the Plan.
Since we were making 60 at one time we made 2 rips (length way cuts) at 18”. Then made 3 rips at 4”. But you will need to figure out the best layout for the number of desks you are making.
You will then cut the legs, stretchers, cubby desk sides and back parts to length from the 4” rips.
Cut the 18” wide rips to 32” for the top for both models and the bottom of the cubby model.
Refer to parts list on the drawings for all other part lengths.

A2 DESK Kindergarten-3rd Grade

LEG ENDS
Set the miter angle to 15 degrees and cut one end of your leg stock.
Measure 25” from the long point of your last cut. Make a mark. Without rotating the piece slide it down until the mark is at the blade. Make your second cut. The angle on the top and bottom of leg should be parallel.
While your piece is still on the table and against the blade set a stop. This will allow you to cut all the legs exactly the same.
Cut the remaining legs.


UPPER LEG PLUMB ANGLE
Since the upper leg angle is too sharp to cut on the miter saw, we use a jig to cut this angle on the table saw. Alternately you could use the dimensions on the drawings and mark out the leg and make this cut with a circular or jig saw. We use a sled that holds the leg at the correct angle and slides along the table saw fence.


STRETCHERS
Change the miter angle on the chop saw to 0 degrees and cut both stretchers to 29-1/2”
You should now have all the parts ready for the pocket hole jig and sander. Sand all part with 220 grit sandpaper before proceeding

POCKET HOLE JOINERY
We used a Kreg Pocket Hole Jig for all joinery. They are available online and at most home improvement or hardware stores. Set your jig for 3/4” plywood and 1-1/2” screws. Use the kreg jig to for the legs and stretchers. See pictures below for number and location in each piece


ASSEMBLY
LEGS
Assemble leg pairs. Be sure to apply glue to contact edges of all parts. Attach using 1-1/2” Kreg screws.

Apply glue at screw joint. Wipe off excess with a damp rag.


UPPER STRETCHER Start by attaching upper stretcher (pocket holes in both ends and along 1 edge) to each pair of legs with glue and 1-1/2: pocket hole screws. Orient screws to the inside or underside of desk.


TABLE TOP ATTACHMENT
Center leg and stretcher assembly on bottom side of Top. Attach with glue and 1-1/2” pocket hole screws.


LOWER STRETCHER Attach lower stretcher (pocket holes in both ends) to rear legs. Orient screws to the backside of the desk.


FINISH
Apply a few coats of your choice of finish. We prefer low V.O.C. Water based clear acrylic. It can be sprayed or applied with brush.

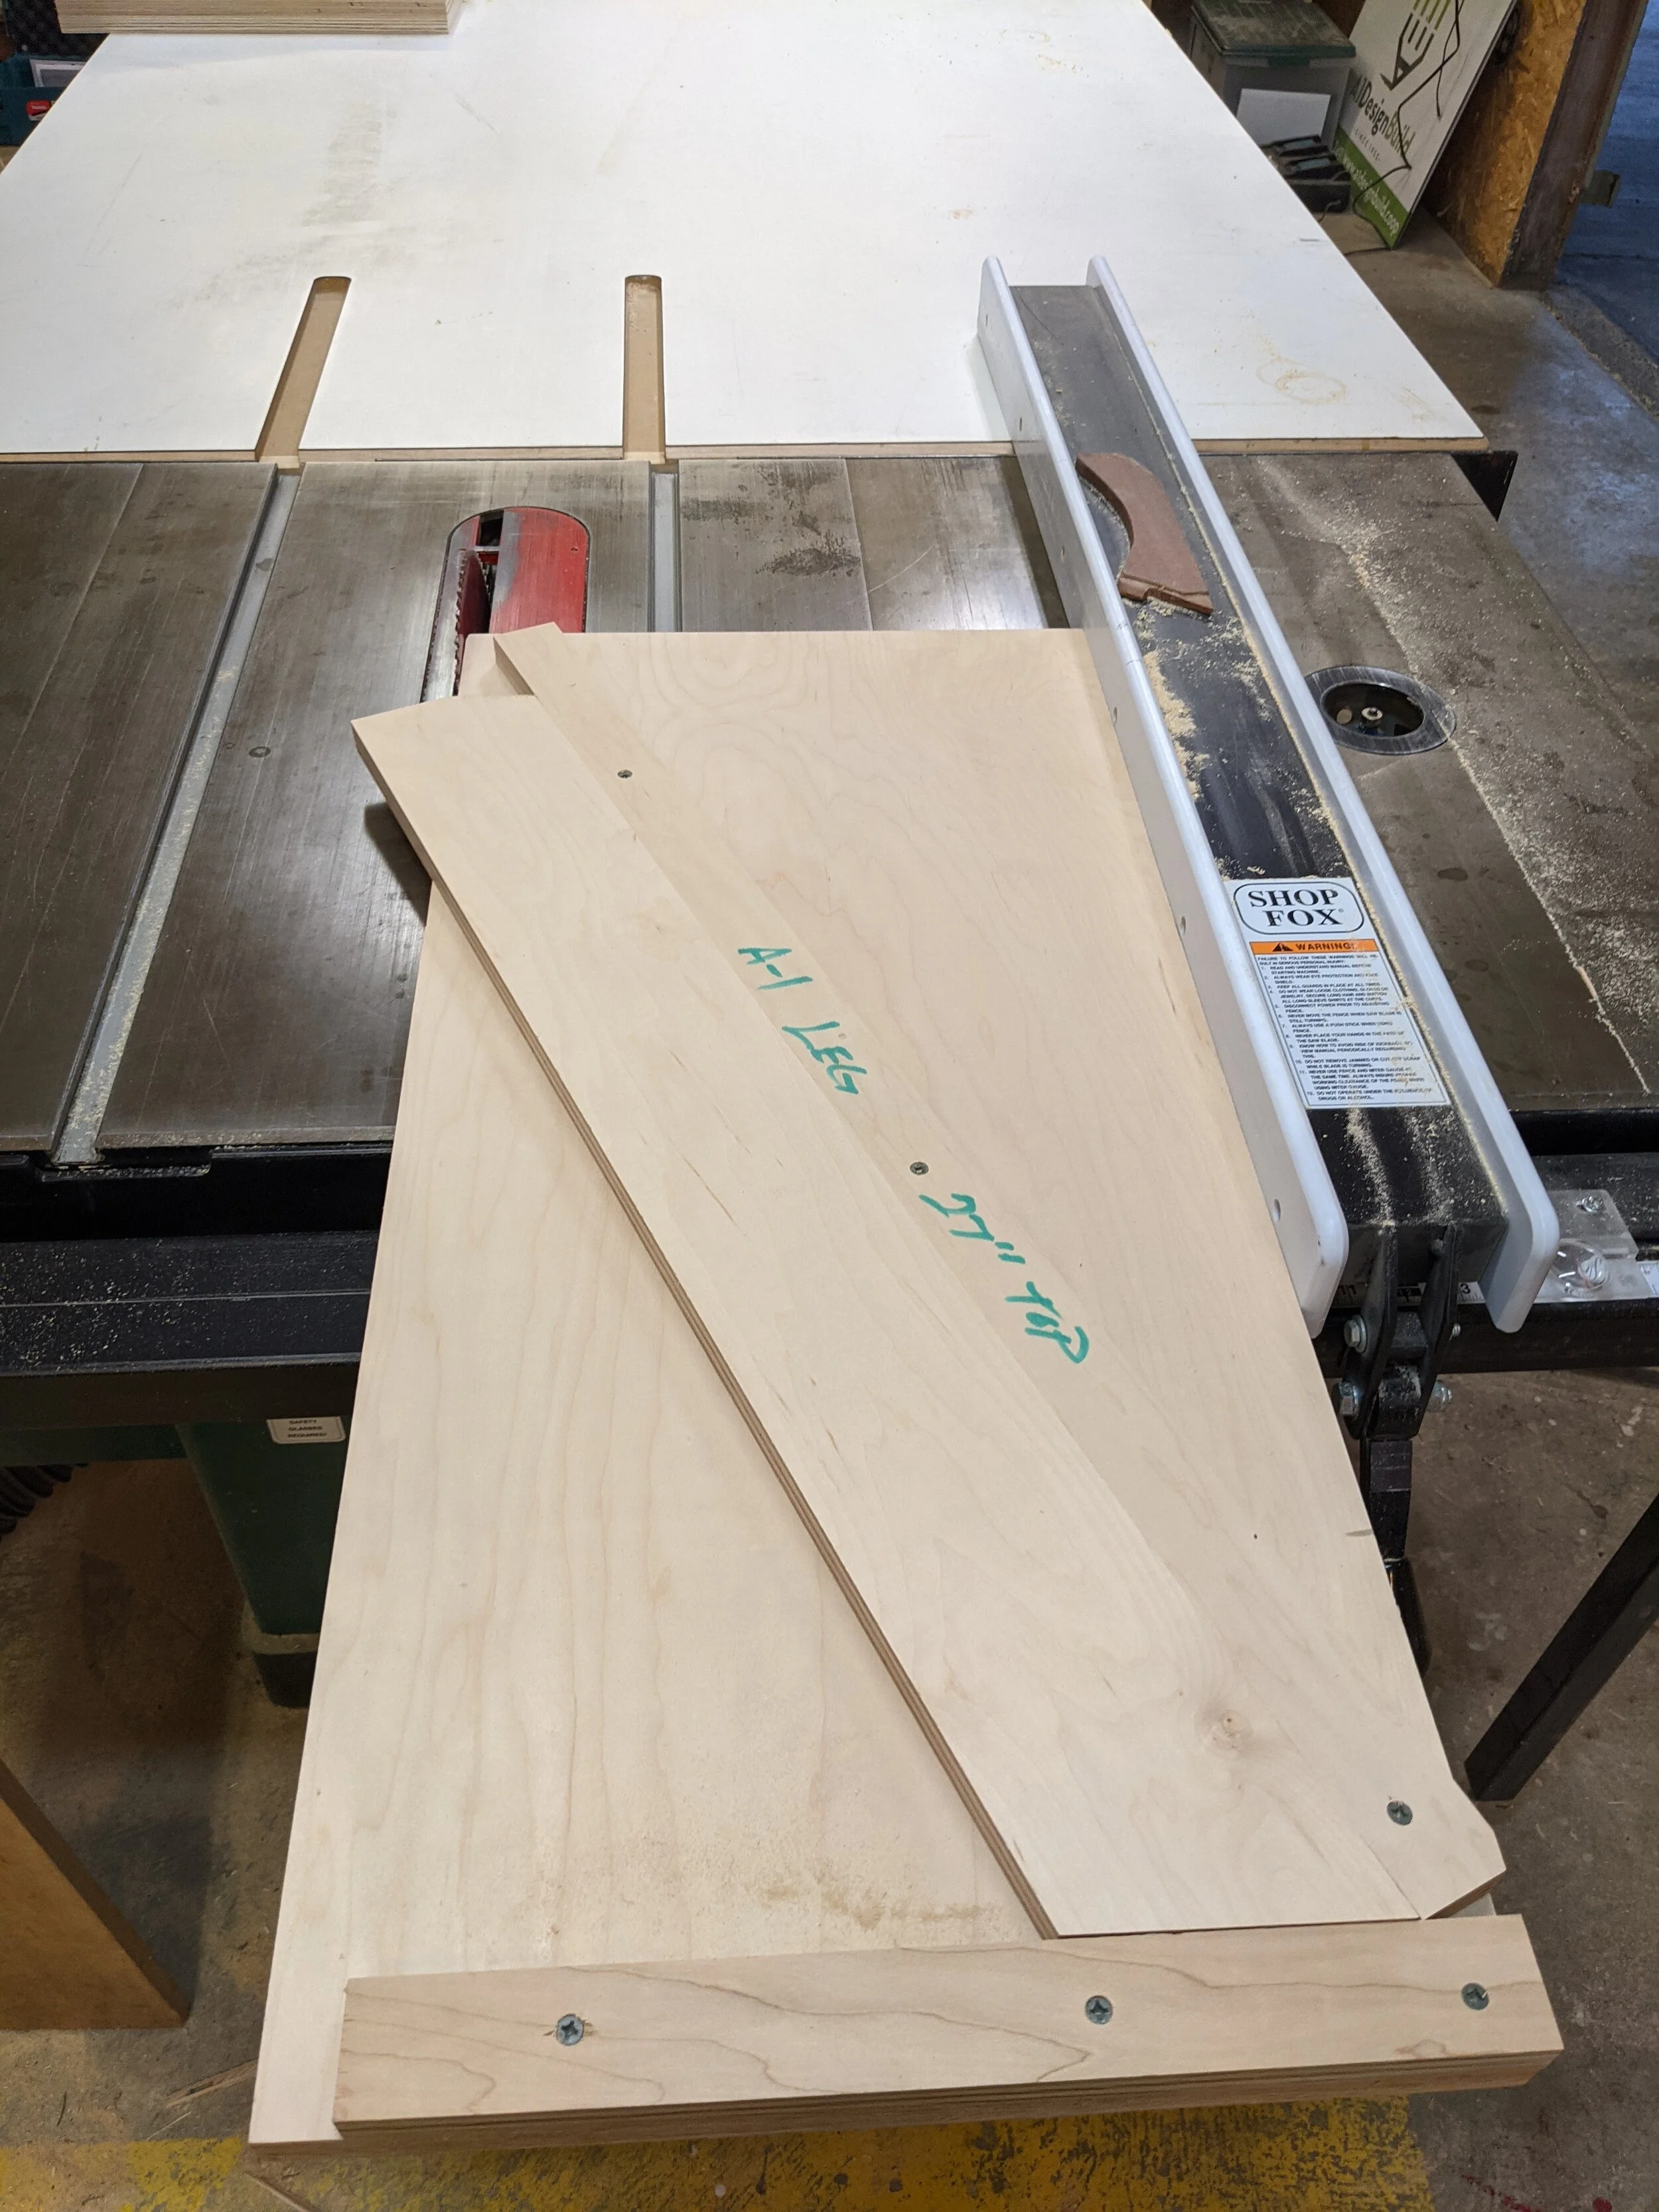
A1 Desk 3rd-6th Grade

LEG ENDS
Set the miter angle to 25 degrees and cut one end of your leg stock.

Measure 29-1/2" from the long point of your last cut. Make a mark. Without rotating the piece slide it down until the mark is at the blade. Make your second cut. The angle on the top and bottom of leg should be parallel.
While your piece is still on the table and against the blade set a stop. This will allow you to cut all the legs exactly the same.
Cut the remaining legs.
There are more detailed steps about this step in the instruction for Desk Model A2
UPPER A1 LEG PLUMB ANGLE
Since the upper leg angle is too sharp to cut on the miter saw, we use a jig to cut this angle on the table saw. Alternately you could use the dimensions on the drawings and mark out the leg and make this cut with a circular or jig saw. We use a sled that holds the leg at the correct angle and slides along the table saw fence. Tis is the same process as for Leg A2, but at a different angle. The legs for A1 only have one leg per side with this steep angle.


ASSEMBLY
See pictures below for number and location of pocket holes in each piece


Glue all joints.

Leg Assembly

Top Assembly-Install the sides BEFORE installing bottom.

Install legs BEOFRE bottom


Make sure you use 1-1/4” Screws here.
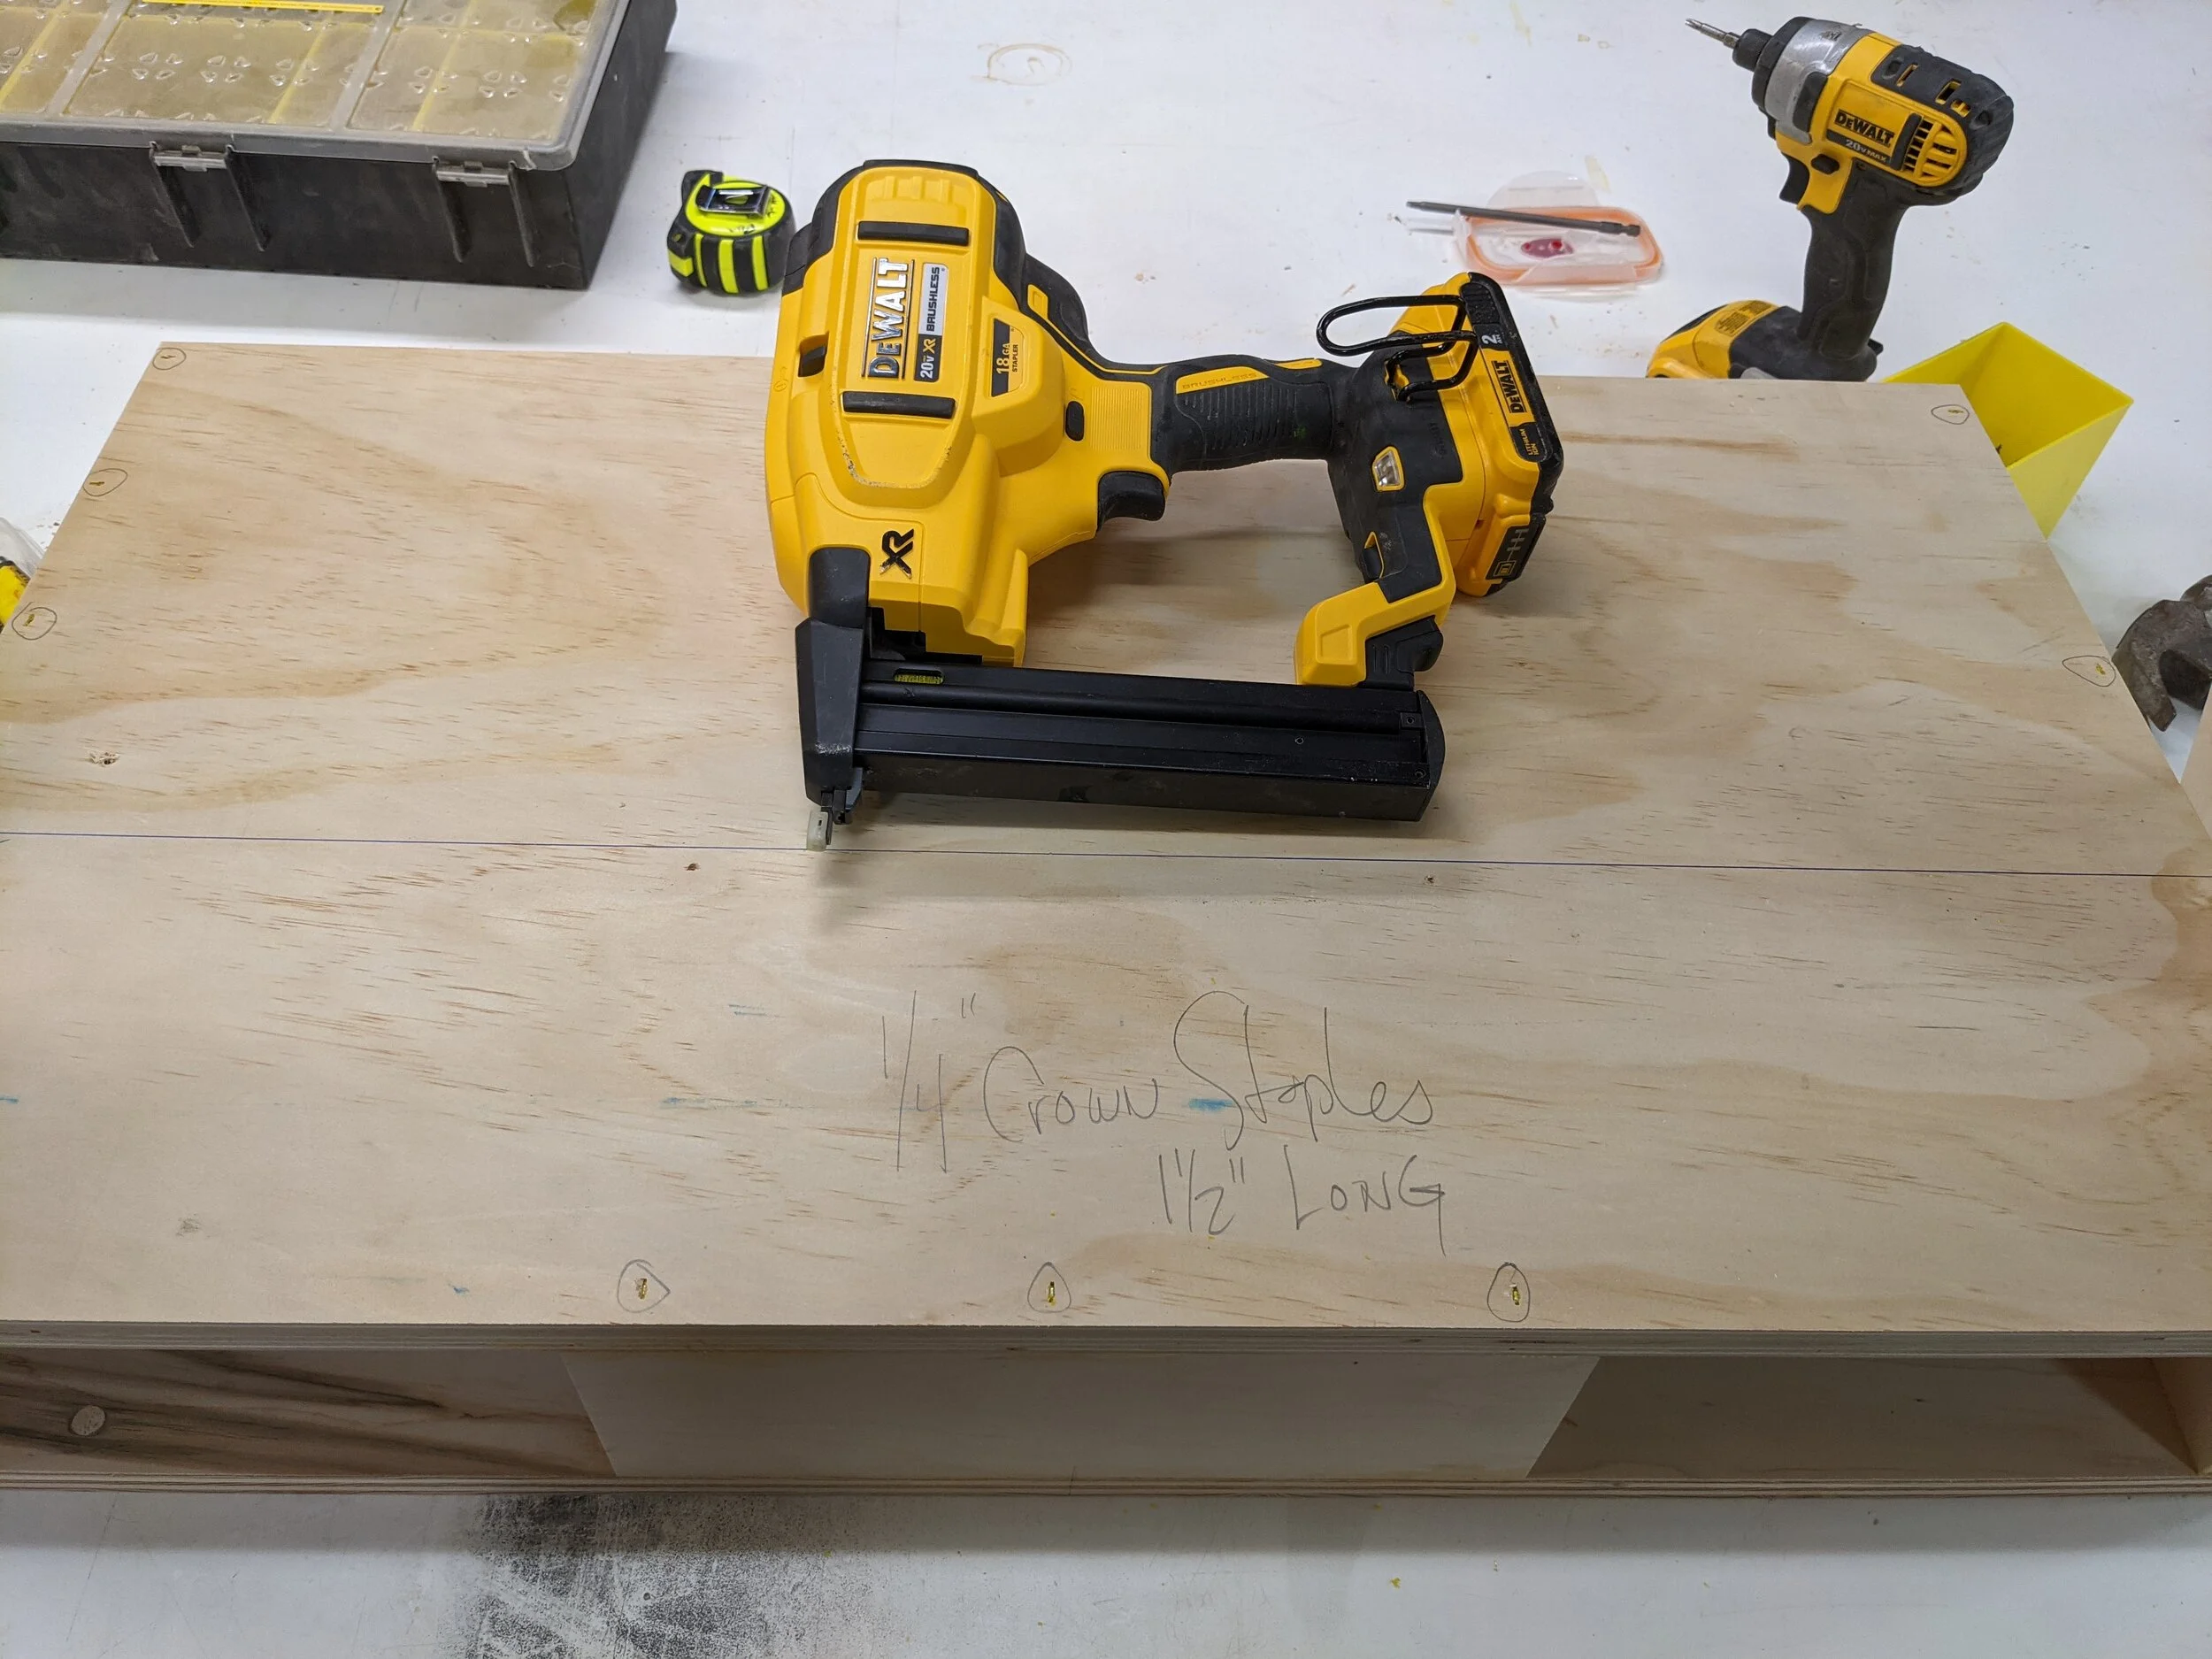
We use 1-1/2” Narrow crown staples to fasten the bottom but 1-1/4” Screws would work too.
FINISH
Apply your finish of choice. We like 2 coats of low V.O.C. water born acrylic.


A1 CHAIR

Refer to the drawing for parts blanks dimensions.
Chair
Once your materials are ripped to width (12”) and sized to length (See cut list on drawings) we are ready to make final angle cuts to all components


LEGS
Set the miter angle to 15 degrees and cut one end of your leg stock.
Measure 13-3/4” from the long point of your last cut. Make a mark. Without rotating the piece slide it down until the mark is at the blade. Make your second cut. The angle on the top and bottom of leg should be parallel.
While your piece is still on the table and against the blade set a stop. This will allow you to cut all the legs exactly the same.
Cut the remaining legs.


SEAT
Measure 12” from one edge of the seat blank. Make a mark
Set the miter angle to 0 degrees and set the bevel angle to 15 degrees. Cut one end of your Seat stock.
Rotate the piece 180 degrees and make a cut at upper corner of the square end. (12”) You should end up with angle on each end facing one another.
Cut the remaining seats.


BACK
Measure 31-1/4” from one end of the back blank. Make a mark. This really could be anything longer than 24”
Set the miter angle to 0 degrees and set the bevel angle to 15 degrees. Cut on the mark..
Cut the remaining backs.

ASSEMBLY
See pictures below for number and location of pocket holes in each piece


FINISH
Apply your finish of choice. We like 2 coats of low V.O.C. water born acrylic.
